Livestreaming Settings
Checking The Current Bandwidth On Your Device
When you are facing issues when hosting, watching the webinar session or doing networking in EventX event, one of the possible reasons might be due to bandwidth or network instability. To verify the root cause, you can check the following:
Browser: Using the latest version of Google Chrome, Firefox, MS Edge, or Safari
Internet speed: https://www.speedtest.net/
Signal Strength Indicator for networking tools
When joining the Networking lounge tables, Booth lounge tables, 1 on 1 video calls and Speed networking you will notice a network signal indicator on the upper left corner.
Signal strength has 4 levels (Weak, Fair, Good, Excellent). When you hover on the icon, it will show how strong your signal is.

How to increase bandwidth?
Internet plan
Getting higher Mbps plan has better performance while streaming video with lots of content.
Recommended bandwidth on hosting or attending a live webinar session
Participating in a live session requires fast connection and strong processing power for optimal streaming speeds. In addition to having a stable connection, we recommend the following bandwidths for hosts, speakers and attendees;
Minimum Upload
Minimum Download
Hosts & Speakers
30 Mbps
10-12 Mbps
Attendees
10 Mbps
10-12 Mbps
- For Organizers
- Here are the recommendations for your devices:
- Browser: Latest version of Google Chrome, Firefox, MS Edge, or Safari
- Operating system: Windows 7+, Mac OS X 10.7+, or Ubuntu 10+
- Network: Internet connection with 5+ Mbps
- Closing other tabs, browsers, and/or programs during live sessions may maintain the streaming stability.
Router
Limit the number of devices connected to the network and moving your device closer to the router could improve your internet connection. If possible, try to reboot router to strengthen internet signal and connection.
Wired
If WiFi connection does not help improve bandwidth, suggest to connect your device with a wired network. It helps prevent bandwidth and connection issues from other devices.
Checking Browser Settings Before Joining An Event
When joining an event make sure to use the supported browsers
- Safari
- Chrome
- Firefox
- Microsoft Edge
Joining an event via Safari
- Please toggle off “Prevent Cross-Site Tracking”
On iPhone
On Macbook
Joining an event via Chrome - Mobile
On iPhone
On Android
- Using normal mode in Chrome browser on Android devices can join the event without changing any default settings.
Using Chrome incognito mode in Android, need to turn off "Block third-party cookies" to join the event.
Joining an event via Firefox
- Using normal mode in Firefox browser on Mac and Windows can join the event without changing any default settings.
- Using Firefox new private window in Mac and Windows will need to toggle off “Enhanced Tracking Protection” to join the event.
Step 1: Go to the highlighted icon next to the link.
Step 2: Toggle off “Allow Cross-Website Tracking”
Joining an event via Microsoft Edge
Both using normal mode and New in Private window in Microsoft Edge browser on Windows can join the event without changing the settings.
Recommend Mic & Camera Setting
Helpful Tips:
Before joining an event, we recommend testing your Mic and Webcam to check if it is working properly and configured correctly. To test your Mic visit: https://www.onlinemictest.com/. To test your webcam visit: https://www.onlinemictest.com/webcam-test/
Camera
When you find your camera is not working, try to follow the checklist below:
1. If you are using built-in camera, check that your camera indicator light is on.
2. If you are using webcam, check if the light is on and set it as input method.
3. Check that your camera has nothing blocked (e.g. tape on the camera).
4. Check if you have granted access for the camera for livestream and networking in video.
5. Re-enter the event by refreshing the page and try joining the live session or networking table again.
Microphone
If you find the microphone volume indicator has no response, try to follow the checklist below:
Check the mic is not muted. You may also test your audio in Audio & Camera Setup to check if it is working.
Check if you have granted access for the microphone for livestream and networking in video call.
Re-enter the event by refreshing the page and try joining the live session or networking table again.
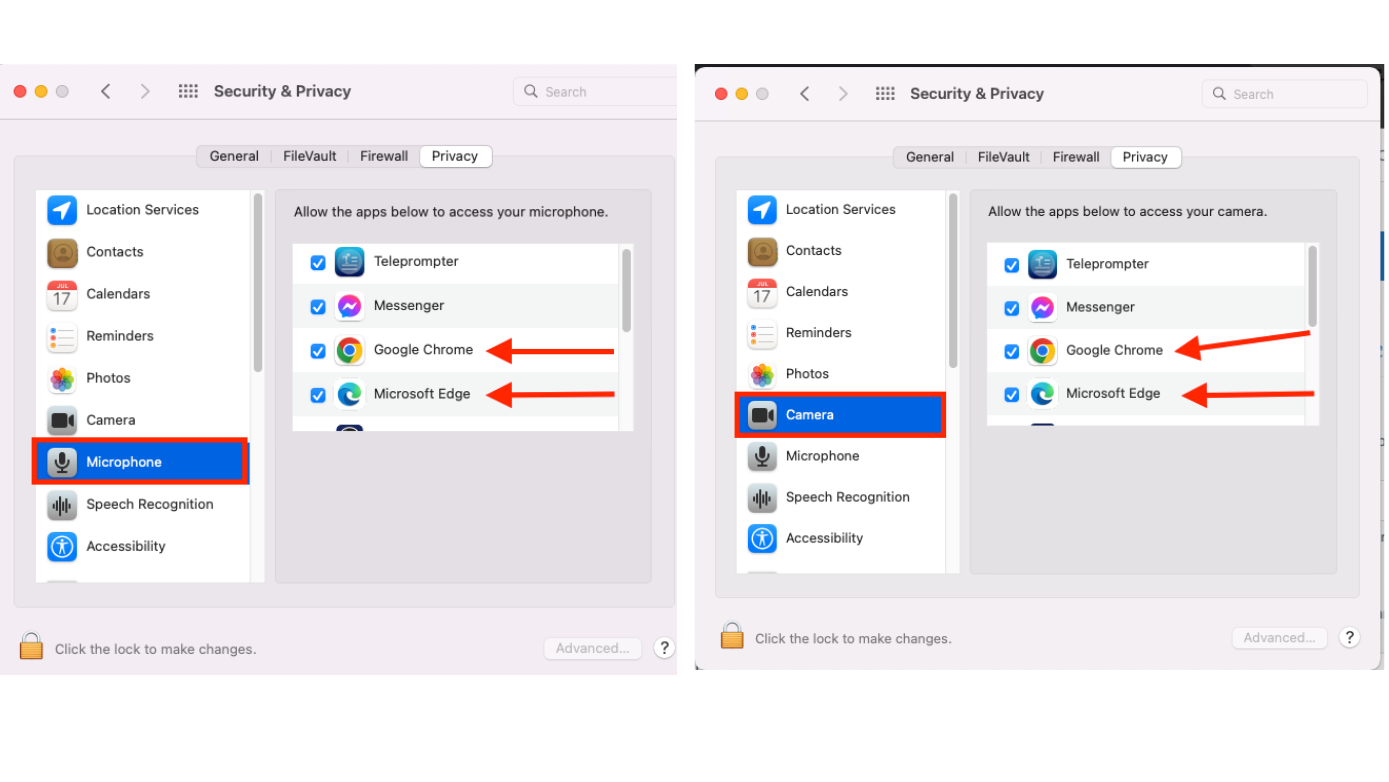
Security & Privacy Computer settings in Mac for Google Chrome, IE, Firefox
When joining a webinar session using your webcam and mic make sure to check the following settings on your Laptop or PC using Mac OS.
1. Go to System preferences and then click Security & Privacy.
2. Under the Privacy tab you are able to check the Camera and Microphone settings.
3. Click the lock icon on the lower left to make changes to the privacy settings.
4. Make sure the browser you are using is checked to allow using the Mic and camera.
5. If changes has been made, click the lock icon to set the changes.
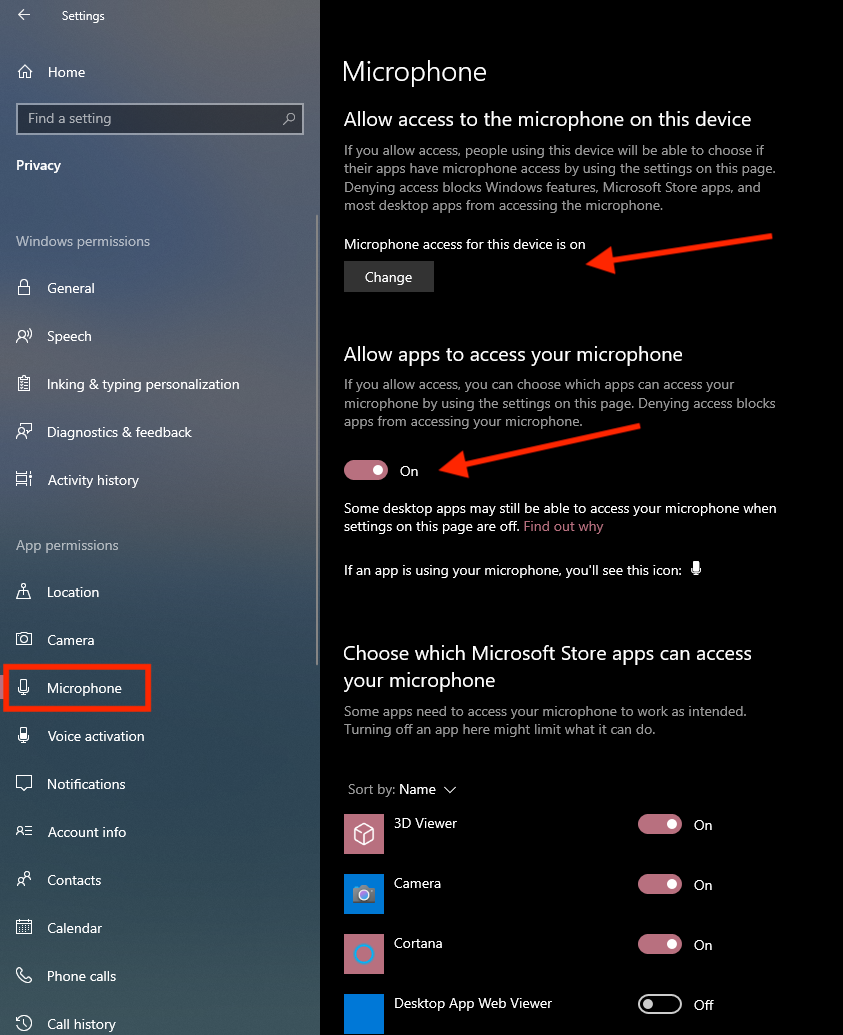
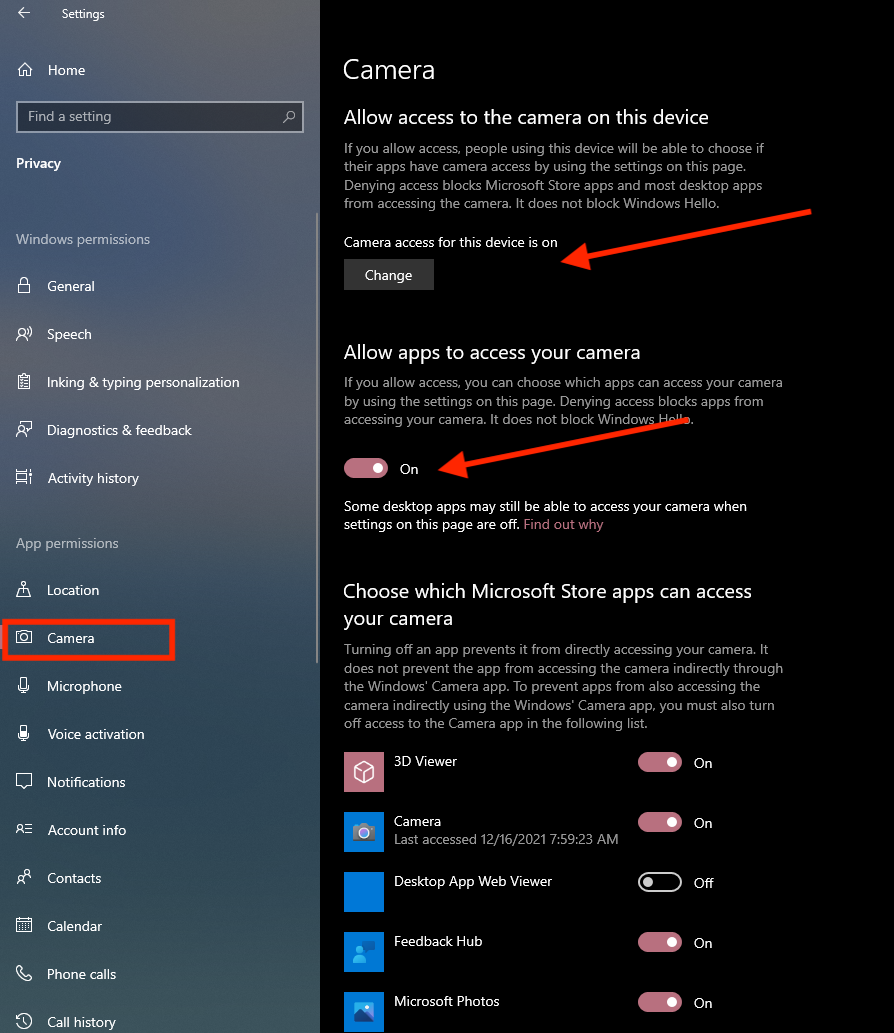
Security & Privacy Computer settings in Windows
When using Windows Laptop/ Computer to join a webinar session. You may check Security & Privacy settings for Camera/Mic.
1. Go to Start > Settings > Privacy > Camera/Microphone
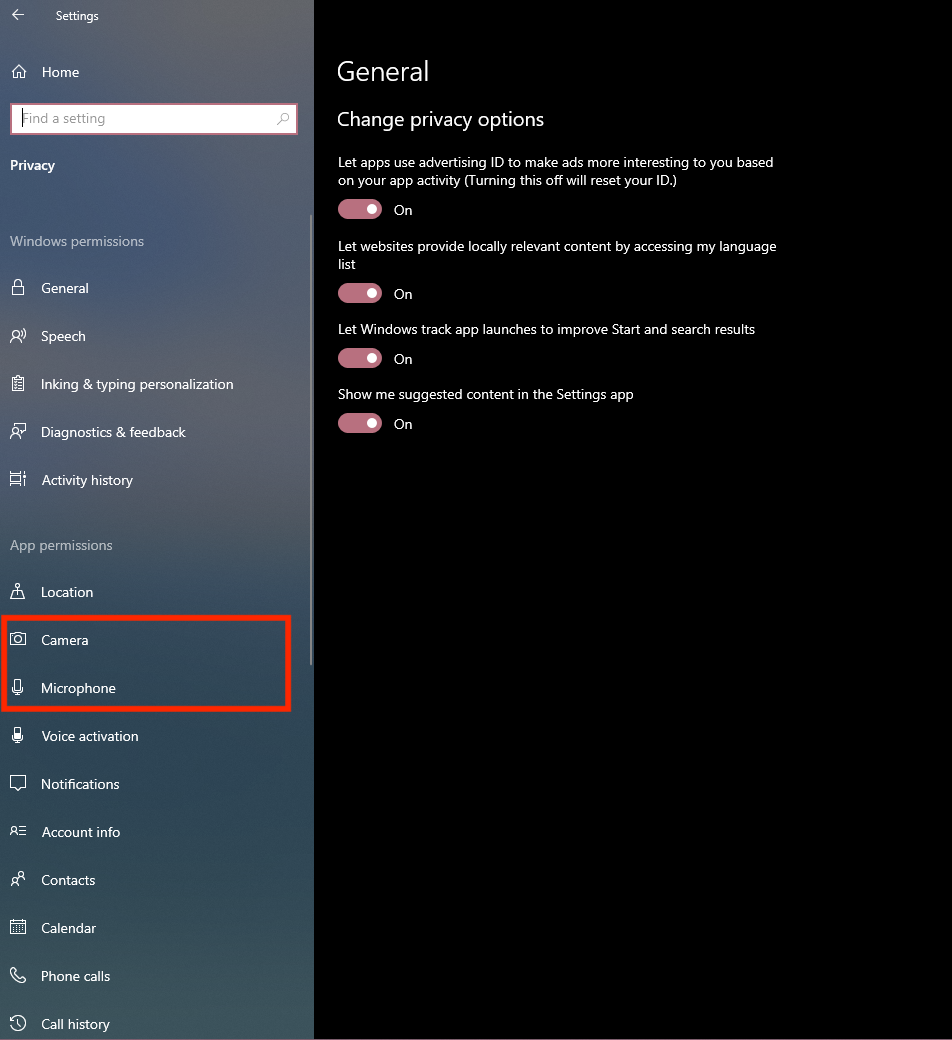
2. Make sure the camera/mic settings are turned ON
Camera/ Mic Settings using Google Chrome
When joining a webinar session using a Camera & Mic on Google chrome, you need to take note of some points on the browser.
1. Make sure the camera and mic are not blocked. To check, find the small mic/camera icon at the end of the URL address line.
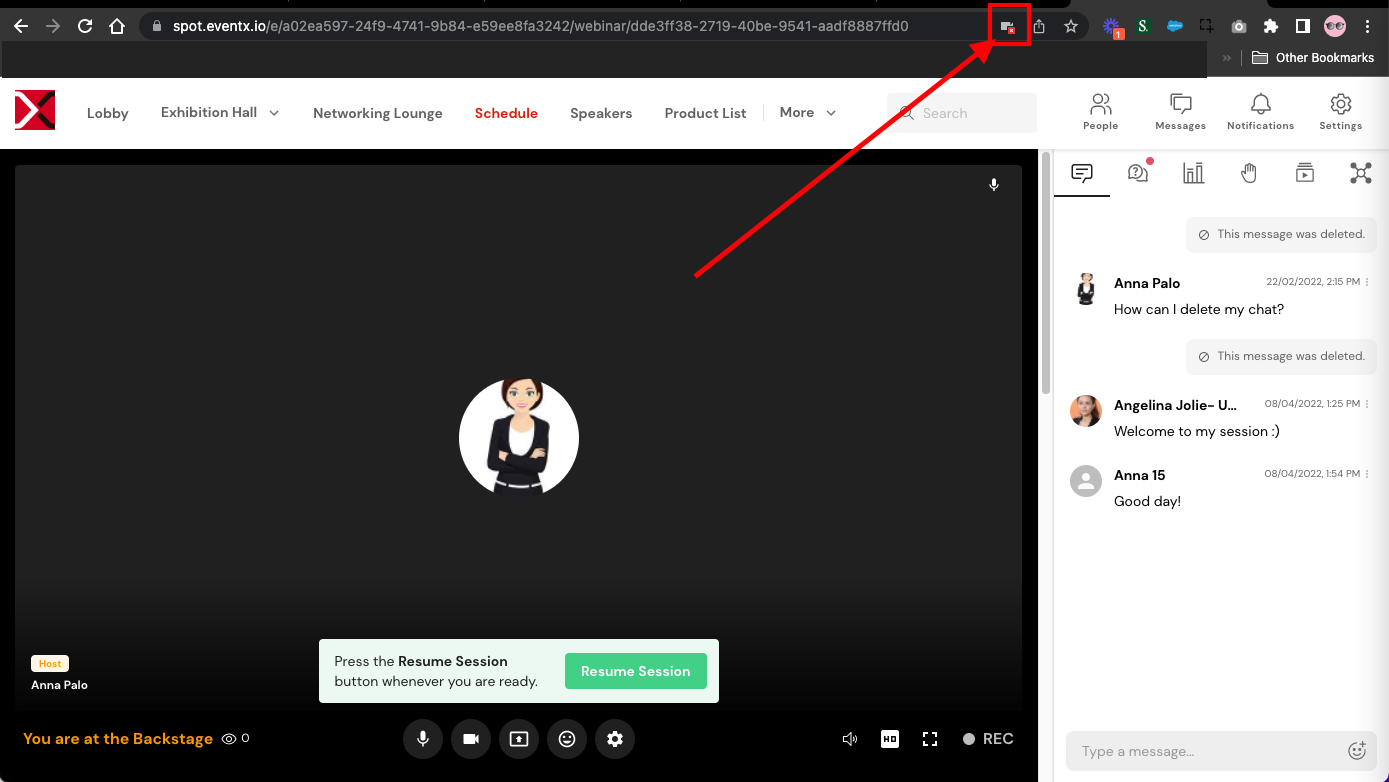
2. Clicking the icon allows you to block or unblock the mic/camera.
Note: In some cases, you would need to refresh the browser for new settings to take place.

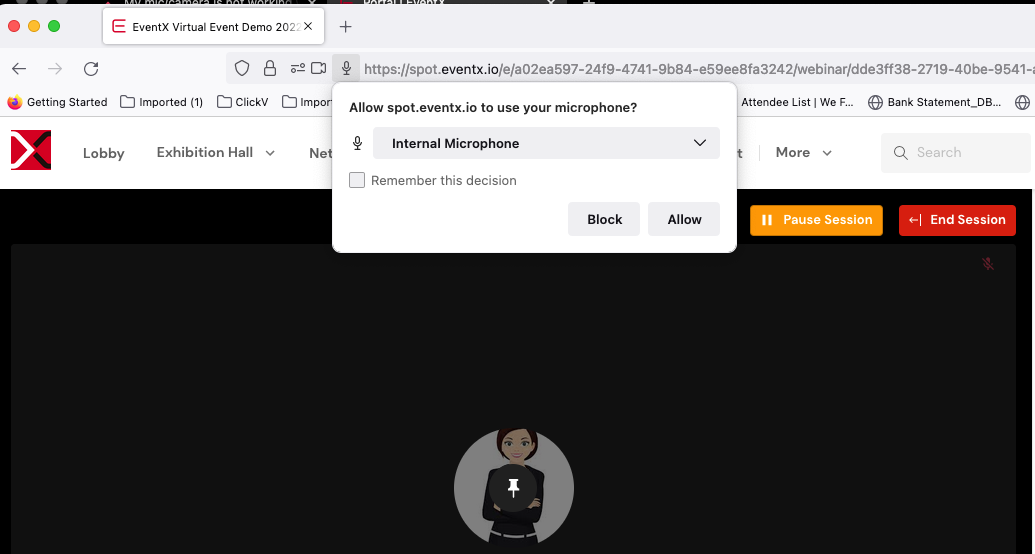
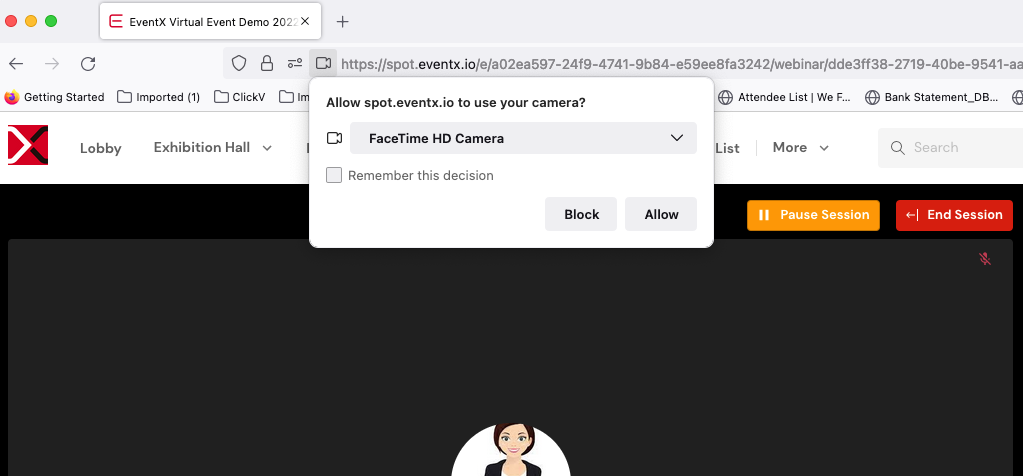
Camera/ Mic Settings using Safari
Upon entering a webinar session, a prompt will be shown giving you the option to change the camera/mic settings. Pick Allow.

You will also see the status of the camera and mic at the end of the Safari address bar


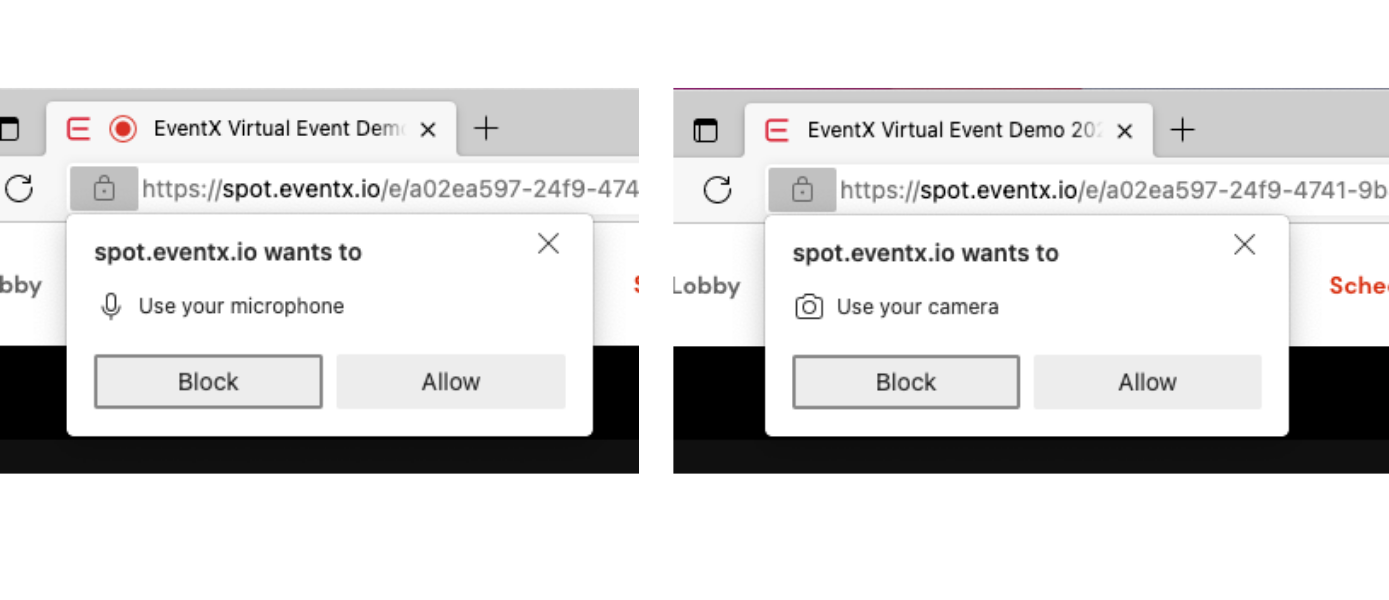
Camera/ Mic Settings using Firefox
When joining the webinar sessions using Firefox browser, take note of the following settings on the browser.
Once you enter the webinar session, you will receive a prompt asking to Block or Allow Mic and Camera.
Once you have entered the webinar session, you may also see the status or mic/camera before the address bar.

Camera/ Mic Settings using Microsoft Edge (ME)
In joining a webinar session via ME. Once you enter the webinar session, you will receive a prompt asking to Block or Allow Mic and Camera.
Once you have entered the webinar session, you will also see the status of Mic/Camera after the address bar.


Related Articles
Optimizing Live Streaming with Dacast: Key Insights and Requirements
Optimizing Live Streaming with Dacast: Key Insights and Requirements Live streaming success relies heavily on proper configuration and understanding of platform capabilities. Dacast, a leading live streaming platform, offers robust features, but ...Event Settings - General Settings
Organizers are able to edit the General Settings of a created event under Event Settings. The items that can be edited under this tab are covered below. Event Language Under this setting, organizers have the option to select the default language and ...Livestreaming Tools
Recommendations For events that require professional shooting for live sessions, it is recommended to engage with a production house. EventX will then discuss with the production house regarding the steps to connect the camera input to our platform. ...How to have virtual background on EventX Live streaming ?
If you would like to blur your background or change to a virtual background, you may do so with a webinar session running on EventX live streaming tool. Here's how you can set your virtual background: Reminders: The virtual background effect is only ...Site Settings
Configuring Site Settings You can manage your Open Graph (OG)’s setting for your virtual event in the Site Settings section. You must be the event administrator to configure these features. This article contains the following sections: How to add or ...