Exhibitor User Guide
Video Guide
- Please watch the recorded video guide via this link.
Support Articles
How To Activate Role & Join Event As Booth Exhibitor / Representative
When you are assigned as an exhibitor or booth representative, you will need to activate the role for editing your booth and/or network with attendees visiting your booth.
Note: Booth representatives won't have access to editing the booth page.
- By clicking Forgot Password
- You will be directed to enter your email address and click Send Verification Code.
- By clicking Send Verification Code, you will receive an email containing the code as below.
- Enter the verification code, enter your new password and click Reset Password. Once succcessful, there will be a pop-up message on the top right corner of the screen and you will then be directed to the Log In page. Simply enter your new password and click Log In.
- By clicking Email Me A Login Link.
- You will be directed to enter your email address and click Send Login Link.
- A login link that is valid for 15-minutes will be sent to the entered email address. Note that the 15-minute time window is the valid period of the link. It is not the period that the user can be within the event site.
- By clicking Log in Now, you will be directed to the registration form.
- Once you have logged in, you will have to fill up the registration form prepared by the organizer. Once done, click Register.
Step 5: After activating the role and logging in to your EventX account, under the "Events" tab - Exhibiting, you will find the event you are exhibiting.
- By clicking "Edit Design" you can edit your booth design.
- By clicking "View Booth" to view your booth design and visit the event site directly on the live event day
How To Edit Booth's Basic Information
To edit booth basic information, follow these steps
Steps
Step 1: Log in to portal.eventx.io using your invited email as an exhibitor.
Step 2: Under the Exhibiting tab, find your booth and click Edit Design.
Step 3: Edit booth basic information.
The exhibitor can edit basic booth information here.
- Booth Name - Up to a maximum of 60 characters is supported.
- Booth Logo - Optimal dimensions 160 x 160px and 2MB or less
- Booth Thumbnail - Optimal dimensions 1200 x 630px and 2MB or less
- Booth Tier - Select the tier level of this booth
- Booth Intro- Provide some information about this booth and up to a maximum of 100 characters is supported.
- Booth Category (Optional) - Assign multiple categories relevant to the booth
Note:
Remember to click the SAVE button when doing some changes.
Once the exhibitor edit booth basic successfully, the booth information will be shown as below,
Display On The Exhibition Hall Page

Display On The Booth Page

How To Edit Virtual Booth Design
To edit virtual booth design, follow these steps:
Step 1: Login to portal.eventx.io using your invited email as an exhibitor.
Step 2: Under exhibiting tab, find your booth and click Edit Design.
Step 3: Edit virtual booth background for Desktop View
For desktop view, under Edit Booth Design, go to Virtual Booth Design. You may choose from the available templates or Upload Custom Background.
Upload custom background - Optimal dimensions 1920 x 1200px and 2MB or less or video with 50MB less
Step 4: You may also add images, videos, or clickable areas by dragging and dropping the elements on the right.

Image - you may insert an external link or internal page (eg. halls, networking lounge, products, etc.), Attendees will be directed to the external link or internal page once they click the image.
Attendees will direct to the external link once they click the image.
Video - Up to 100MB video can be uploaded. You may turn on the Auto Play button if you wish to play the video automatically.
Clickable Area - you may insert an external link or internal page (eg. halls, networking lounge, products, etc.), Attendees will be directed to the external link or internal page once they click the area
Attendees will be directed to the external link once they click the image.
Step 5: Edit virtual booth background for Mobile View
Image - Optimal dimensions 1920 x 1080px and 2MB or less.
Video - Up to 50MB.
- A maximum of 5 images or videos can be uploaded.
Note:
Remember to click the SAVE button when doing some changes.
Add Multi-lingual Content
Basic Information
Booth Content
Form Submission
How To Edit Booth Content
- If you are not logged-in to the Booth Design Portal, simply log-in at portal.eventx.io using your invited email address and password that has been set up when you join the event as an exhibitor (more details on joining the event as an exhibitor under the How To Join Event As Booth Exhibitor / Representative section above)
- Click "Edit Design" under Events - Exhibiting
- Click "Booth Content" and edit the corresponding booth content that has been assigned to your booth by the organizer.
Note: If your event has multiple languages, you will need to input the multi-language content manually by clicking on "Edit Content Language" - Once the edits are done, remember to click "Save & Next"
How To Add A Form To Your Booth
If you are a booth exhibitor and want to know more about attendees, you can enable the form submission function to collect the required information from the attendees.
Reminders
- Organizers can add questions to the form on the booth edit page in the organizer portal
- Booth exhibitors can add questions to the form on the booth edit page in the exhibitor portal
- Only 1 form could be created in each booth
- The organizer cannot restrict booth exhibitors to edit the preset question from the organiser portal
- Attendees can submit the form more than one time under the same booth
- When there are no fields added in the booth form submission builder, the "Submit Form" button will be hidden on the booth page
- There is no limited number of question organizer /exhibitors can be added to the form
- For exporting the form's report, please contact your project manager via email at help@eventx.io.
Steps
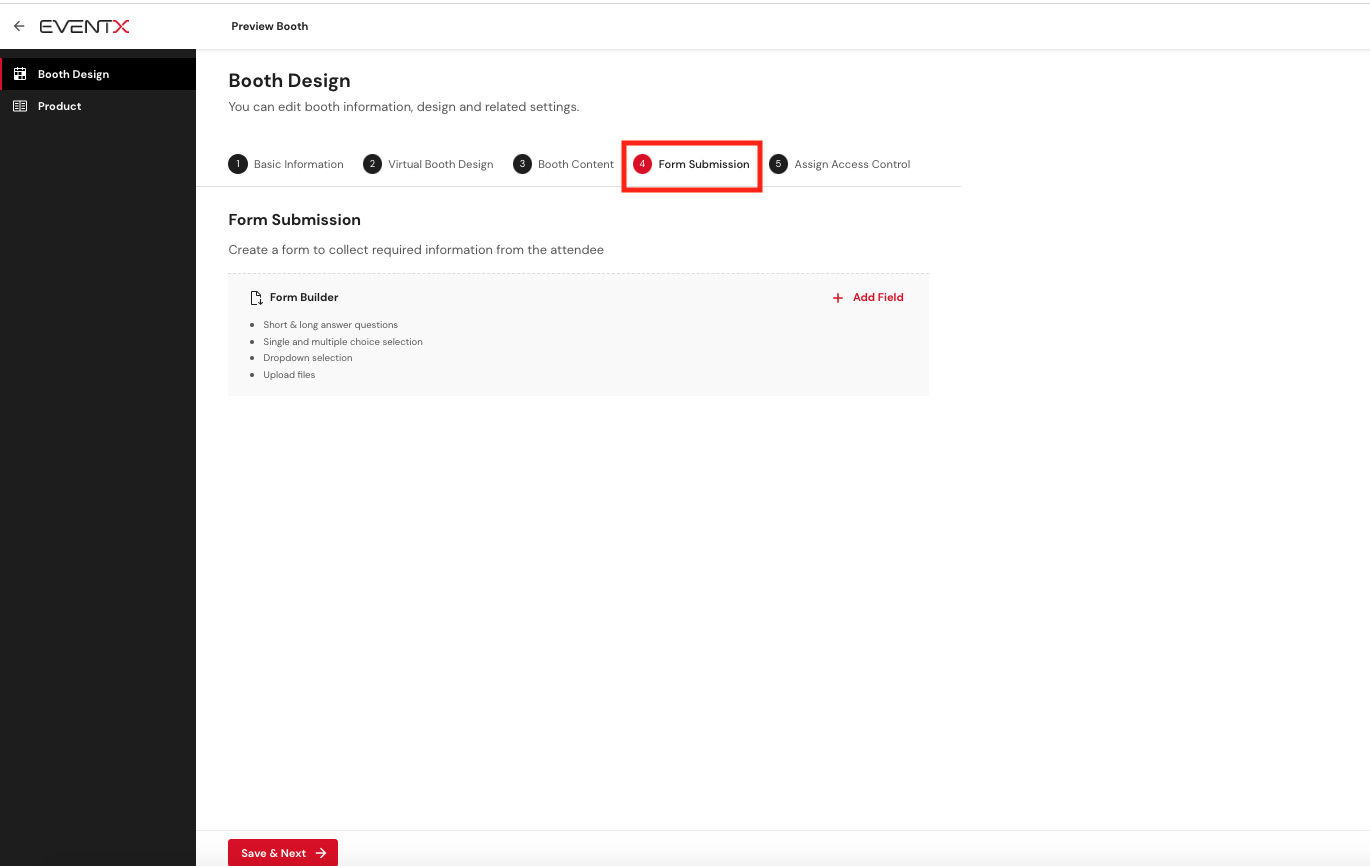
Step 2: Click “Add Field” to choose from the types of custom field questions.
The form supports
- Short answer questions (Answer input field allows up to 100 characters)
- Long answer questions (Answer input field allows up to 300 characters)
- Single and multiple choice selection (selection up to 7 answers)
- Dropdown selection (single selection from the dropdown with unlimited answers)
- Upload files (supported Format: All formats except HTML, CSS & Javascript, maximum Upload FIle Size: 50MB)
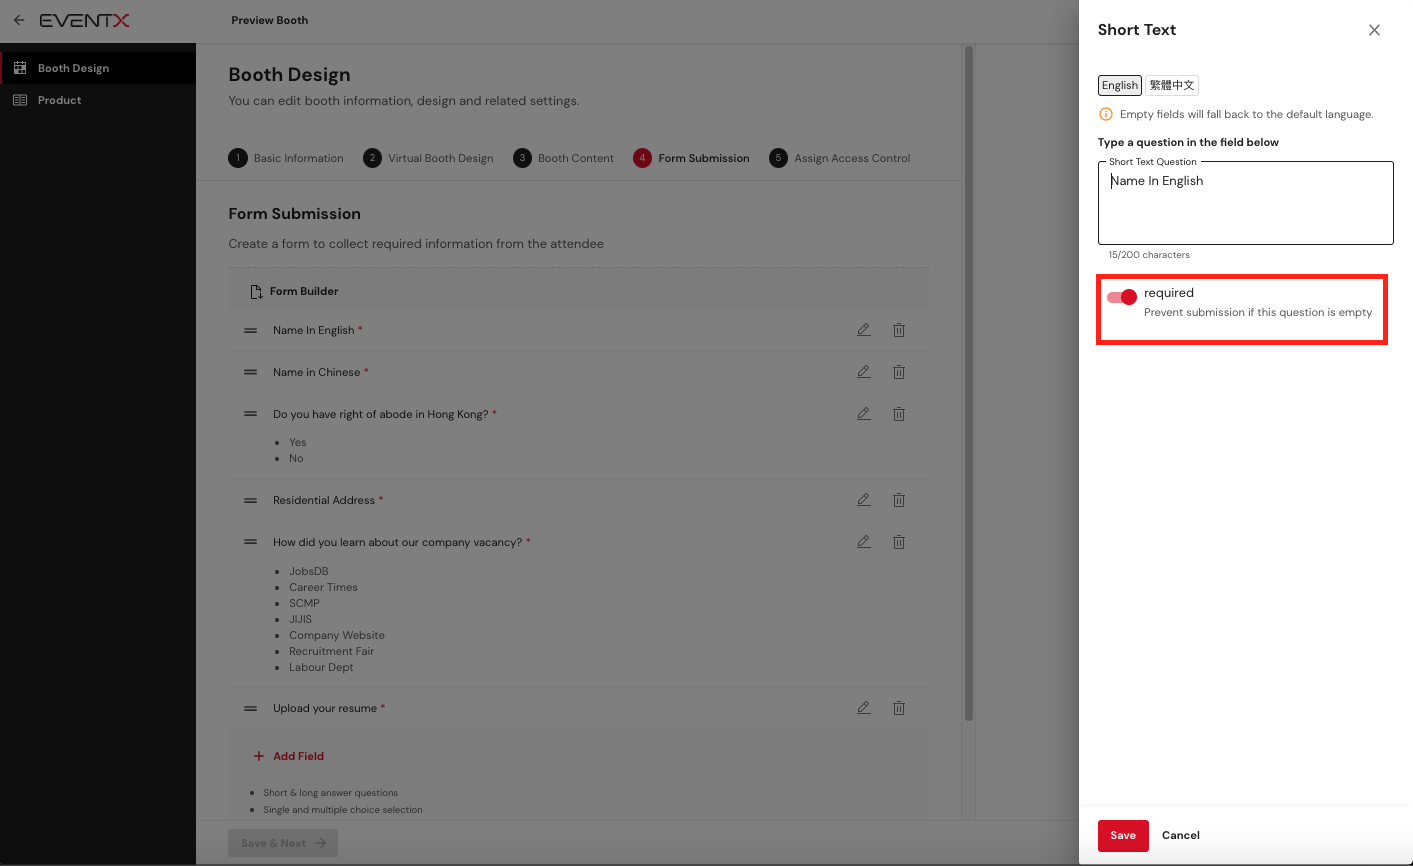
Step 3: After choosing a custom field, type your question. Toggle on required to set the questions that must be answered.
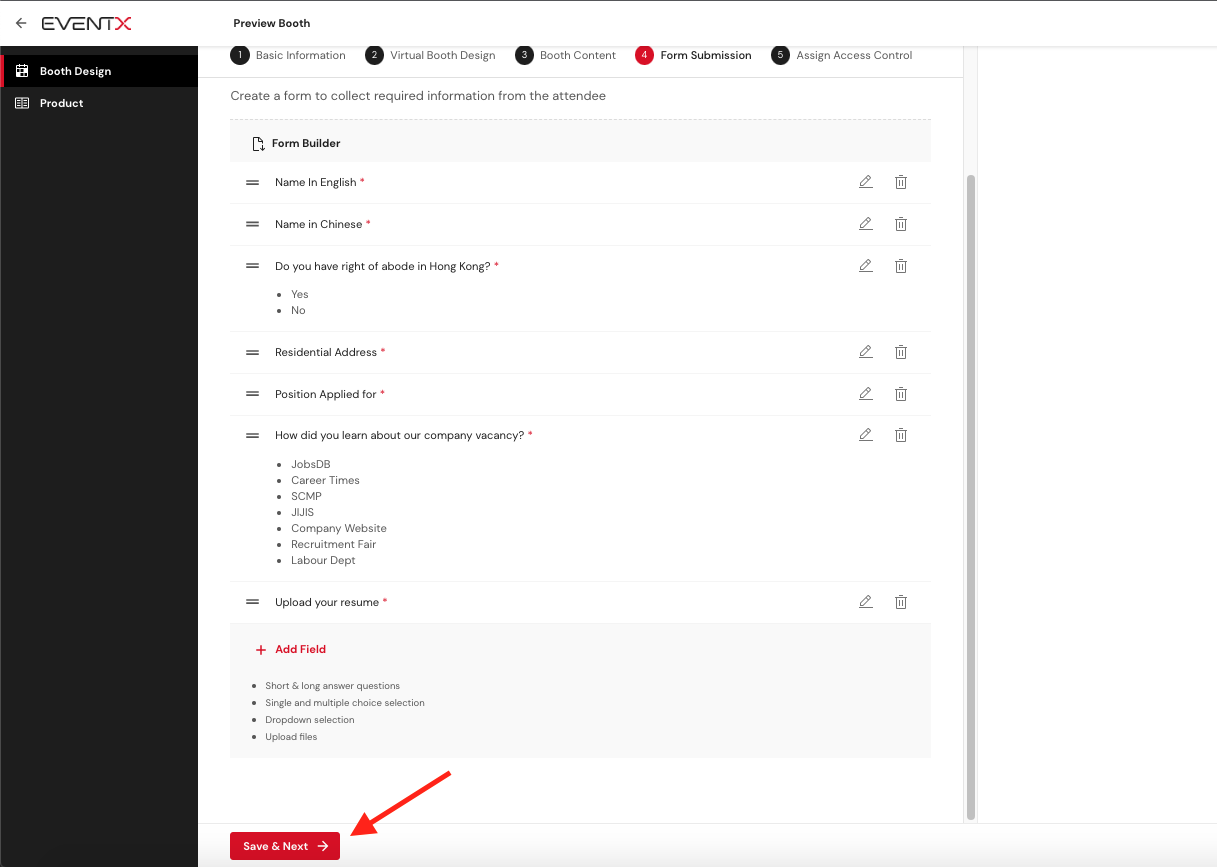
Step 4: To reorder the field by drag and drop or click the "Remove" button to delete the field from the builder

Step 5: Click the "Save & Next" button after editing the form to save the changes.
After setting up this feature, attendees will be able to click “Submit Form” and answer the question in the booth.

Once attendees successfully submit the form, a message will be shown in the top right-hand corner.

When uploading a file which is larger than 50MB, there will be an alert to inform the file is exceeded the maximum file size limit.

How To Add Booth Exhibitor / Representative
Assigning an additional exhibitor or booth representative means allowing your representative to edit your booth and/or Network with attendees visiting your booth.
Note: Booth representatives won't have access to editing the booth page.
Adding Booth Exhibitor/Representative
Follow these steps in adding your booth exhibitor/ representative:
Step 1: On the Edit Booth page, go to the 'Assign Access Control' tab and click on 'Assign Access'.

Step 2: 'Add Access Control' sidebar appears. This is where you can choose to add a booth Exhibitor or Booth representative.
- Type in the representative's email
- To include SMS sending, pick the country code and type in mobile number.
- Tick 'I want to send SMS invitation to the user'
- Choose an assigned role (Booth exhibitor or Booth representative)
- Click Send Invitation button.

The details will immediately appear on Exhibitor & Booth representative control page. An invitation email will be sent to the booth exhibitor / representative once Send Invitation is clicked.
Note: The invited booth exhibitor or representative needs to log in using the invited email address.
How To Delete An Assigned Booth Exhibitor / Representative
If your booth representative is no longer part of your event and you wanted to delete him under your assigned representatives you can do that in just a few clicks.
Step 1: On the Booth Design page, under 'Exhibitor & Booth representative control', find the name of the booth representative you would like to delete.
Under Actions click on the trash bin icon to delete.

Step 2: Confirm deleting the representative by clicking "Delete Role".

How To Access Exhibitor Dashboard
Important Reminders
- The exhibitor dashboard will only be visible to exhibitors on the event live day or if the organizer allows exhibitors to access the event platform before the live day.
- If special role access is turned on, exhibitors can see the dashboard if they view their booth
- It will only show the first 100 activities.
- The activity records will be removed from the dashboard after 72 hours.
- The exhibitor dashboard data cannot be exported.
How to view the Exhibitor Dashboard
Step 1: Log in to your EventX account at portal.eventx.io using the invited email as an Exhibitor.
Step 2: On the welcome page, under Events, click on View Booth to view your booth and view the exhibitor dashboard.
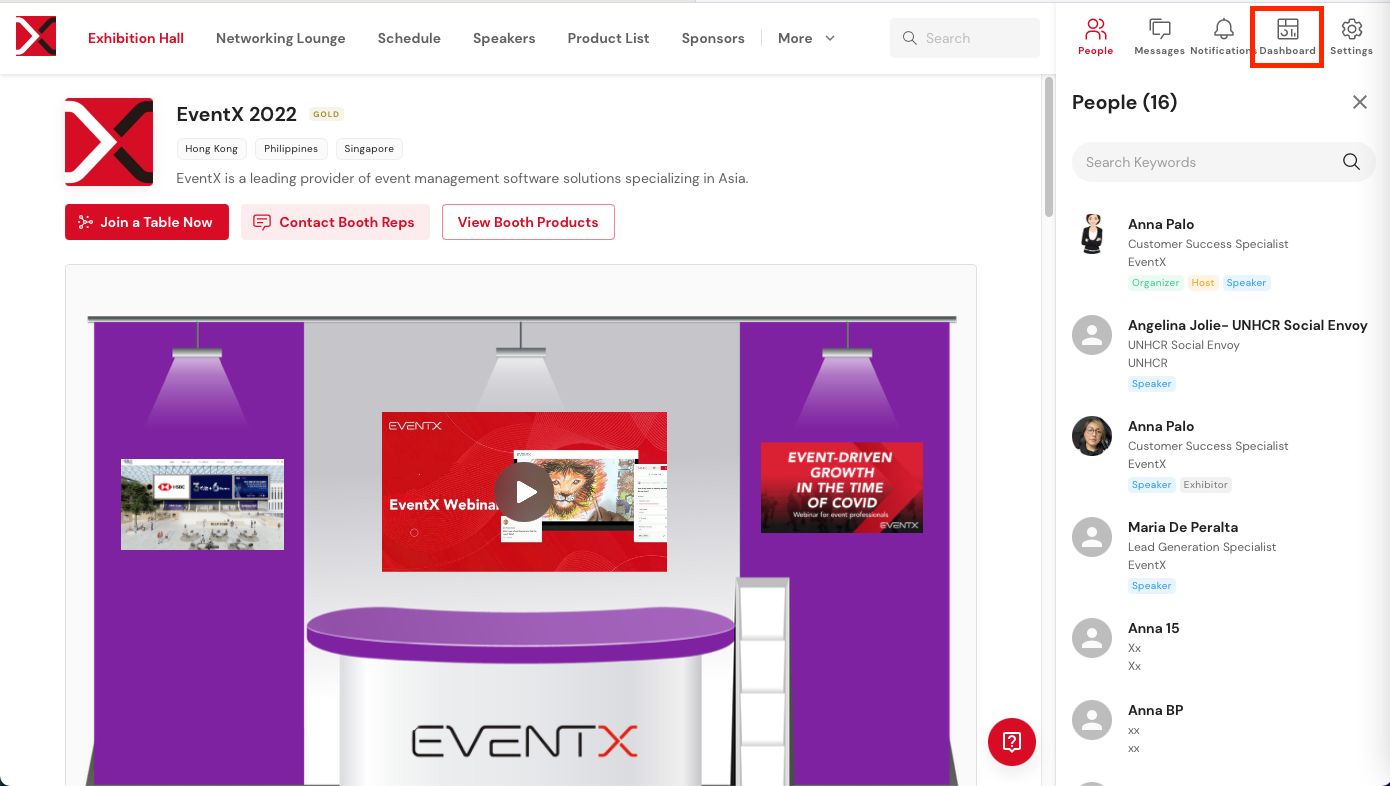
The Exhibitor Dashboard function allows you to filter and see attendee activities such as:
- Entered Booth
- Viewed File
- Joined Table Chat
- Messaged Booth Exhibitor/Rep
- If the same exhibitor is assigned to 2 booths, a drop-down box is available to switch between booths.
Exhibitors will be able to see attendees entering the booth. By hovering over the attendee's name, exhibitors can chat or do a 1-on-1 video call with a specific attendee.
How To Add & Edit The Booth Products
Adding Booth Products
Step 1: After logging in to your exhibitor account, on the exhibitor page go to the "Product" tab
Step 2: On the upper right corner, you'd see the + Add Product button. Click that to add a new product. It will pull up the Product information page wherein you can type related information about the product or add files, images, or videos. Below is the information available to showcase your product.
Product Name
Category (Optional)
Product Featured Images/Videos
Product Description (Optional)
Downloadable Files (optional)
Reordering Product Sequence
To arrange the order of your product list. All you have to do is to drag the specific item to its designated order.
Editing & Deleting Products
Under the listed products, you will be able to see the Edit and Delete icon.
To edit the product- click the pencil icon
To remove the product- click the delete icon, a confirmation to delete the product pops up.
Reminder: Don't forget to click SAVE after making changes to your booth products.
Layout On Event Site (Attendee View)
Exhibitor products will also be displayed on the event Product List.

How To Preview Booth
You can preview your booth to check on the booth design and content. Follow the steps below to preview your booth.
Remarks
- The clickable banner will not be able to preview for the click action if the event has not been published by the organizer.
- The products will not be shown under the booth preview if the event has not been published by the organizer
Steps
Step 1: Log in to portal.eventx.io using your invited email as an exhibitor.
Step 2: Click "Edit Design" under Events - Exhibiting

Step 3: Click the "Preview Booth" Button on the booth design portal
Step 4: Preview the Booth

Related Articles
Exhibitor Guide
Video Guide Please watch the recorded video guide via this link. Support Articles How To Activate Role & Join Event As Booth Exhibitor / Representative When you are assigned as an exhibitor or booth representative, you will need to activate the role ...Event WebApp
EventX WebApp Setup Guide For Organizers Please refer to the following guides to setup the WebApp as an organizer. Menu Bar & Theme Color Organizers are able to customize the navigation bar and also change the theme color of the event under the Menu ...Exhibitor Booth Setup Guide
Setting up your exhibitor booth is easy. Know what you can do to promote your company using your exhibitor booth. Just follow this video guide.Exhibitor Dashboard
For exhibitors to see, interact, and get to know the booth visitors better, EventX supports the Exhibitor Dashboard feature (only available for Virtual Event & Expo users) Important Reminders The exhibitor dashboard will only be visible to exhibitors ...Organizer Guide in Creating an Event
Here's a video guide covering the different functions and features in setting up an EventX Virtual Event. 00:00 Introduction 00:09 Dashboard 00:27 Physical Check-in 00:47 Event Settings- Basic Event info 01:10 Event Settings-General Settings 01:55 ...