Use Case: Assigning Table Number to Attendee
This article will walk through a common use case - assigning table numbers to event attendees.
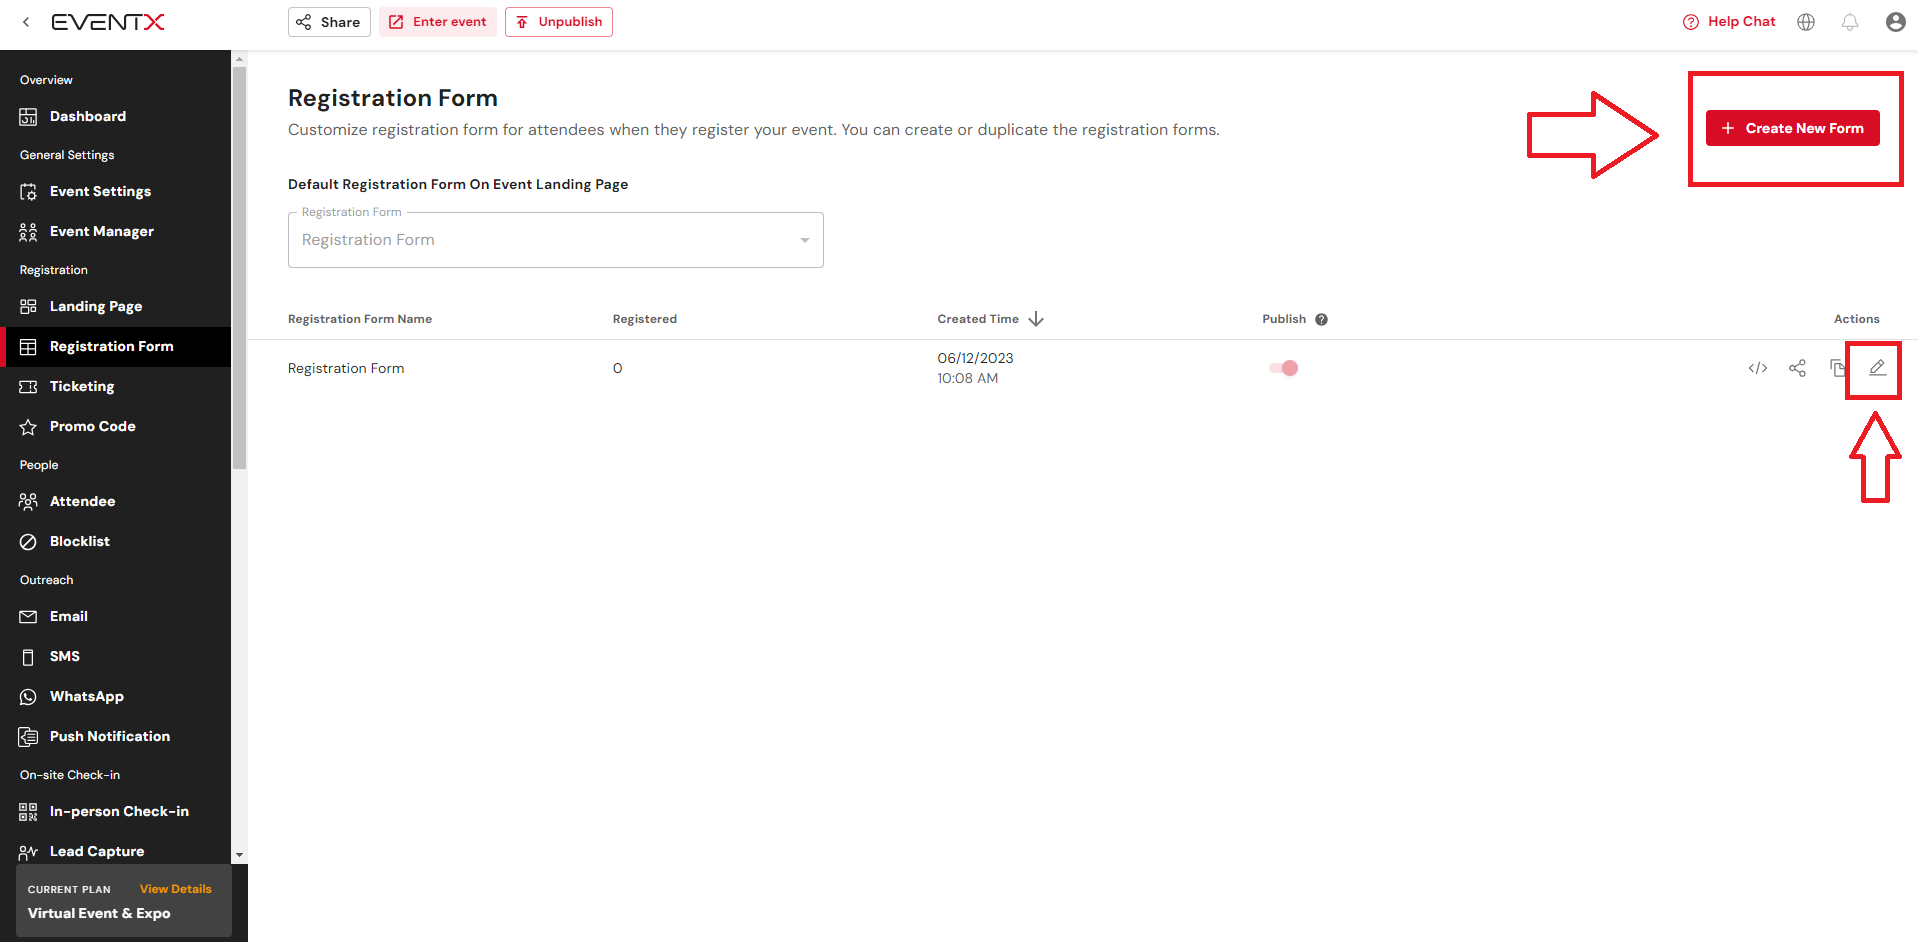
Create a Registration Form
Click on Create New Form to create a new registration form or click on the edit icon to edit an existing form.
Click "Manage Field" and create new custom field.
Create "Table number" as a new field for the event attendee
A dropdown field is used to display the tables available for the event.
Assign "Table number" on the attendee
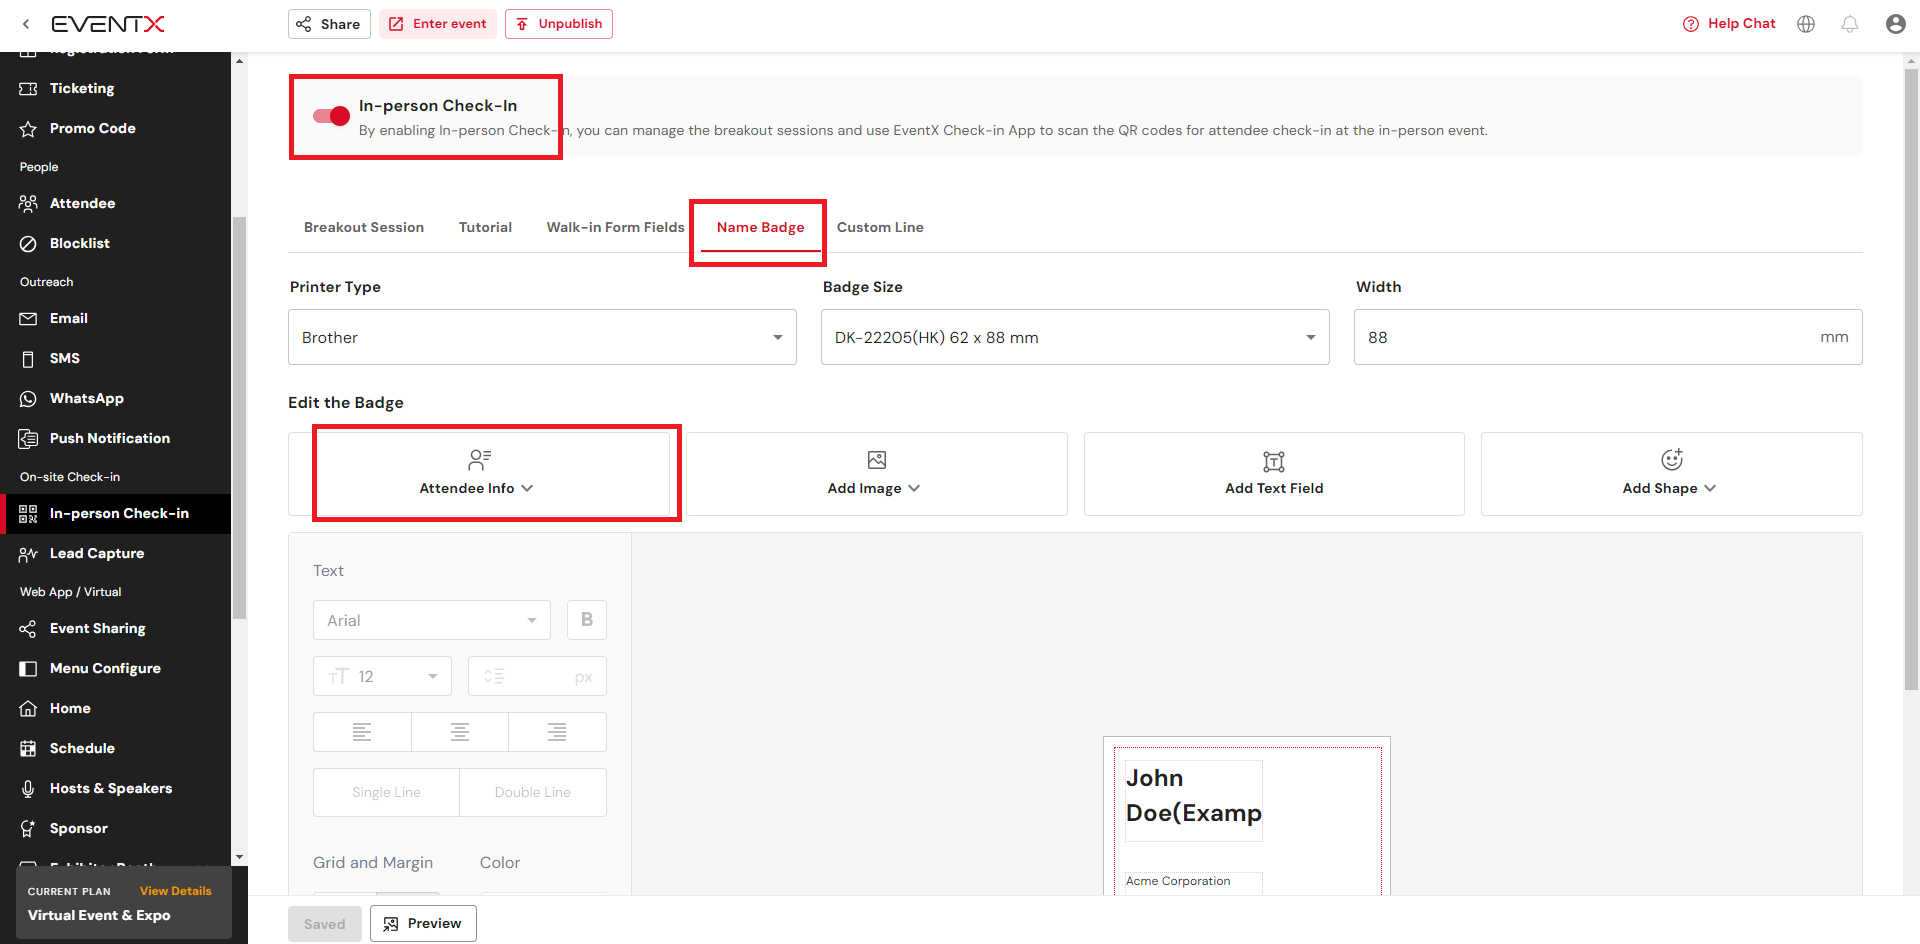
Choose "Table number" on the badge design
Under In-person Check-in > Name Badge > Attendee Info, select the custom feld "Table number" and edit the placement of the field on the namebadge template. Click Save once the design is done. Click Preview to preview the namebadge design.
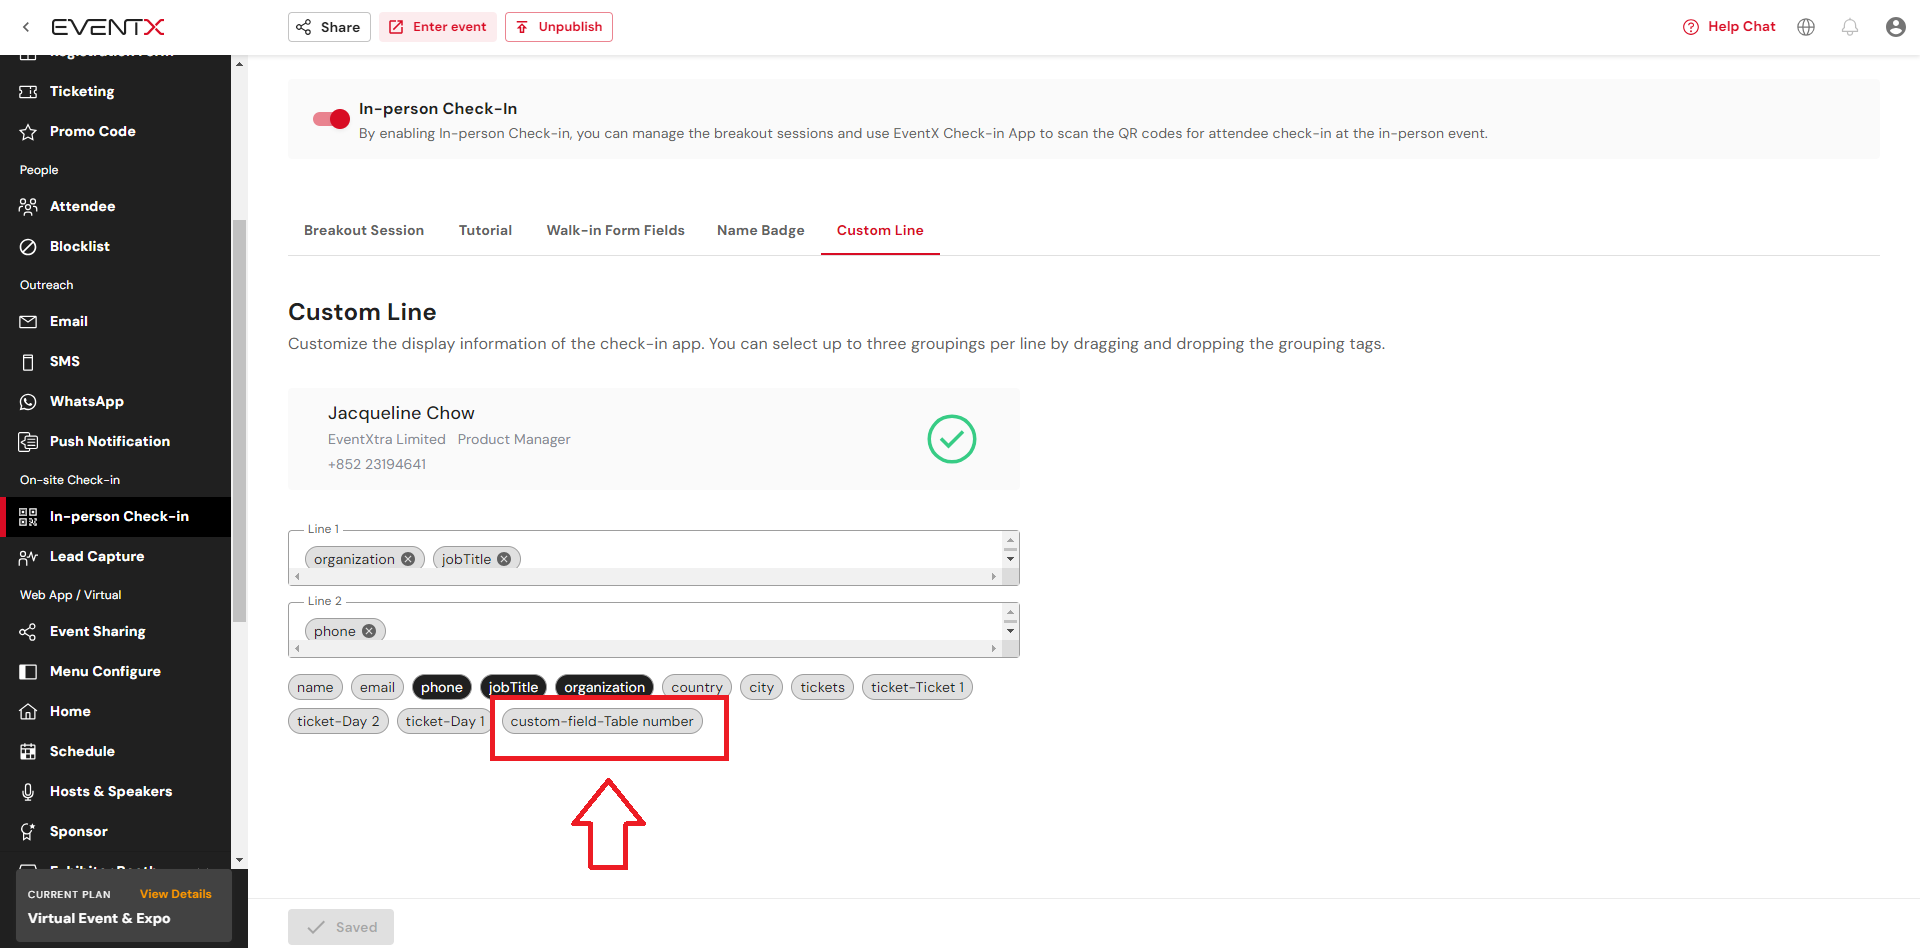
Under In-person Check-in > Custom Line, drag and drop the "Table number" custom field that has been created onto either line 1 or line 2. This will help display the table number on the Check-in App when checking-in an attendee.
Print "Table number" on the badge
The table number assigned to the attendee will be printed on the badge once the custom field is included on the template.
Show "Table number" when scanning e-ticket
When scanning the e-ticket for the attendee, the Table no: 2 will be also shown.
Show "Table number" on the Check-in App attendee list
Indicate the "Table number" field to show on the attendee list
On the Check-in App, "Table no: 2" will be shown on John Doe
Enable the "Table number" shown on the Event WebApp
To enable the "Table number" field on the attendee profile setting
On the Event WebApp, the "Table number" field will be shown after clicking to the attendee details.
Kiosk mode
Allow attendee to check the table number by Kiosk mode. This is a self serve setup, allow attendee to check the table number on their own.
Viewing table number through registration form response
Attendees are able to view the responses submitted for their registration form. This way, if the organizer has included the table number as a question on the registration form, it can be viewed as well.
- When on the landing page, click on the My Registration button at the bottom of the screen (mobile view)
- Scroll down to locate the corresponding question.
- To view it inside the webapp, click on the icon on the top left corner on mobile view.
- Click Account Information and find the corresponding question field.
How can the attendees view their own / other attendee's table number?
Organizer setup
If the table number is a question field that has been created, go to Event Settings > Attendee Profile Settings and select the question field to add it to the attendee profile.
Attendee view
- Enter the webapp > Click on the people icon
- Search for your name / other attendee names and the click on it. The table number will be shown as below.
Related Articles
Use Case: Assigning a Number and adding the field on Attendee name badge
A common use case for lucky draw purposes is to assign a number to attendees to be included on their namebadges. Please follow the steps below to do so. Create a custom field. Go to the People List → Click Manage Fields Click + Add New Field Click ...Use Case : Changing RSVP Attendee's Email Address
If an attendee that has been invited through RSVP invitation would like to change their contact email address, please take note of the following. The user cannot change their own email address on the registration form as the email address is ...Use Case: How to Hide Poll Result From Attendee?
1. Create new Poll and go to presenter mode 2. Show Polling QR code to attendee and click "View the Polling" and make sure NOT to click "show result" 3. Attendee start voting from webapp 4. Organiser can delete present mode window and check result ...Use Case : Sending unique links to attendees after the event has ended
Some organizers would like to send out unique links to their attendees after they have successfully attended an event. This can be done by using our manual email campaign. Examples of use cases that could benefit from the steps mentioned in this ...Use Case : Importing Attendees As Invited Status & Sending Invitation Email
There are 3 methods to import the attendees as invited status to ensure that they go through the registration process. The methods are as described below. Method 1 : Importing attendees using RSVP invite while sending them manual email This method is ...